Vermicomposting: Worm Composting at Home
On this page
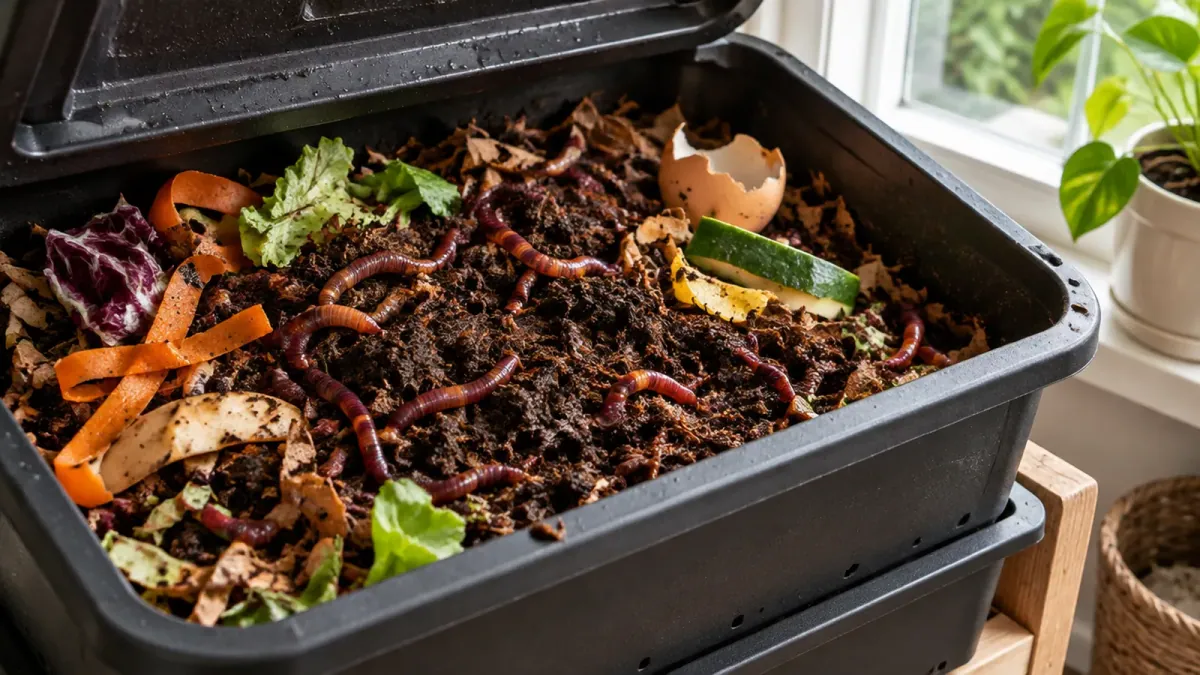
Vermicomposting is composting with red wiggler worms in a bin. To start, set up a ventilated bin with damp shredded paper or cardboard bedding, add worms, and feed small amounts of fruit and vegetable scraps, burying them in the bedding. Keep the bin damp, between roughly 55 and 77°F, and harvest the dark, crumbly worm castings after a few months.
What is vermicomposting?
Vermicomposting uses worms to turn food scraps into worm castings, a nutrient-rich soil improver. It is compact and quick, which makes it ideal for apartments, balconies, garages and kitchens. A well-run bin doesn’t smell, and it processes scraps that would otherwise go to the trash. If you are new to composting, start with our guide to composting for beginners at home, and browse our garden care hub for more.
Worm bin vs compost pile
| Feature | Worm bin | Outdoor pile |
|---|---|---|
| Space | Small; indoors or out | Needs yard space |
| Speed | Months | Months to a year |
| Materials | Kitchen scraps and paper | Kitchen and yard waste |
| Temperature | Cool (55–77°F) | Can be hot |
| Smell | Low when well managed | Low when balanced |
| Output | Worm castings | Compost |
| Meat and dairy | No | No |
What you need
- A bin. A plastic tote with a lid (about 10 to 18 gallons for a household’s kitchen scraps), or a purpose-made worm bin with trays.
- Ventilation holes in the lid and sides, and small drainage holes in the base.
- A tray or lid underneath to catch leachate if the bin is indoors.
- Bedding. Shredded newspaper, plain cardboard, coir or dry leaves.
- Red wigglers. About 1 pound of worms suits a bin processing roughly 3 to 4 pounds of scraps a week, though recommendations vary.
- A little soil or finished compost to introduce helpful microbes and grit.
How to set up a worm bin
- Drill holes for air in the lid and upper sides, and a few small holes in the bottom for drainage.
- Prepare the bedding. Shred paper and cardboard, then moisten it until it feels like a wrung-out sponge.
- Fill the bin about two-thirds with fluffy bedding and add a handful of soil.
- Add the worms on top and leave the lid off for a few minutes. Worms avoid light and will burrow down.
- Wait a few days before feeding so worms can settle.
- Start feeding with a small amount of chopped scraps, buried under bedding.
- Place the bin somewhere cool and shaded, such as under a sink, in a closet, in a garage or on a covered porch, away from direct sun and freezing temperatures.
Feeding worms
| Good foods | Foods to limit | Foods to avoid |
|---|---|---|
| Fruit and vegetable scraps | Citrus and onion | Meat, fish and bones |
| Coffee grounds and filters | Bread and cooked grains | Dairy and eggs |
| Tea bags (plastic-free) | Garlic and spicy foods | Oils and greasy foods |
| Crushed eggshells | Moldy food in small amounts | Pet waste |
| Shredded paper and cardboard | Salty foods | Glossy or coated paper |
How much to feed
Start small, about a cup of scraps every few days, and increase as worms eat faster. Add more food only when the previous batch is mostly gone. Chopping scraps into small pieces speeds up eating. Freezing scraps first and then thawing them breaks down cell walls and makes them easier for worms. Our what can you compost list helps with questions about specific items.
Caring for your worm bin
- Moisture: keep bedding as damp as a wrung-out sponge. Add dry paper if it is too wet, and spray water if too dry.
- Temperature: aim for 55 to 77°F. Worms slow when cold and can die in heat above about 85°F.
- Air: stir gently every week or two to let air in, and keep vents open.
- Bedding: add fresh bedding as the old breaks down.
- Light: keep the bin dark; worms avoid light.
Harvesting worm castings
After two to four months, the bedding will turn into dark, crumbly castings. To harvest:
- Move the finished material to one side of the bin and add fresh bedding and food on the other. Worms migrate toward the food.
- After a week or two, scoop out the castings from the first side.
- Alternatively, use a tray system, adding trays so worms move upward.
- Dump and sort onto a tarp under a bright light, and worms burrow down so you can scrape off the top layer.
Using worm castings
Worm castings are rich, mild and gentle on plants. Mix them into potting mix, sprinkle a thin layer around plants, add to seed-starting mix in small proportions, or brew a “tea” by soaking them in water. They are a good addition to the best soil for indoor plants and and garden beds as part of an overall plan; see our guide to improving garden soil.
Common problems and fixes
| Problem | Likely cause | Fix |
|---|---|---|
| Bad smell | Overfeeding, too wet or too little air | Stop feeding; add dry bedding; stir |
| Fruit flies | Exposed scraps | Bury food; cover with a layer of bedding |
| Worms trying to escape | Too wet, too acidic, too hot or too cold | Check moisture, temperature and food; add crushed eggshells |
| Mites or tiny insects | Too much moisture or food | Reduce feeding; harmless in small numbers |
| Worms dying | Heat, dryness or toxic food | Check temperature and feed; replace bedding |
| Leachate in the tray | Too wet | Add dry bedding; use leachate diluted on plants |
| Mold on food | Overfeeding | Remove uneaten food; reduce feeding |
How many worms do you need?
| Scraps per week | Worms needed (approx.) | Bin size |
|---|---|---|
| About 1–2 lb | About 1/2 lb | 8–10 gallon tote |
| About 3–4 lb | About 1 lb | 10–18 gallon tote |
| About 6–8 lb | About 2 lb | Larger or multi-tray bin |
These figures are rough guides; worms eat roughly half their body weight a day under good conditions. Start with fewer worms and a small amount of food; the population will grow to match the food supply and space.
Buying and caring for worms
Order red wigglers from a reputable supplier, or get a handful from a local gardener with a thriving bin. Don’t dig up garden earthworms, which prefer soil. When worms arrive, put them in the prepared bin right away and keep them out of direct sun. If you go away, a well-fed bin can usually be left for a couple of weeks with extra bedding and a large feeding buried under it.
Winter and summer care
| Season | Care |
|---|---|
| Summer | Keep the bin shaded and cool; add extra bedding; avoid temperatures above about 85°F |
| Winter | Move indoors or insulate; feed less, since worms eat slowly in the cold |
| Spring and fall | Check moisture; increase feeding as worms become active |
Can you vermicompost outdoors?
Yes, if temperatures stay within the worms’ range. In mild climates, a covered bin outdoors in shade works well. In cold winters, bring the bin indoors or insulate it; in hot summers, keep it shaded and cool. Protect from rain and rodents with a secure lid.
Is vermicomposting worth it?
If you want a quiet way to recycle kitchen scraps and produce a great soil improver in a small space, it is hard to beat. It won’t handle large amounts of yard waste or all food waste types, so it complements rather than replaces outdoor composting. See our guide to how to start a compost pile if you also have yard waste to handle.
Frequently asked questions
What is vermicomposting?
Vermicomposting is composting with worms. Special composting worms, usually red wigglers, eat food scraps and bedding and produce worm castings, a rich, crumbly soil improver. It works well indoors or in small spaces, because a worm bin is compact, produces little smell when managed properly and processes kitchen scraps faster than many outdoor piles.
What kind of worms are used for vermicomposting?
Red wigglers (Eisenia fetida) and similar species such as Eisenia andrei are the standard composting worms. They live in surface organic matter, eat quickly and breed readily. Common garden earthworms and nightcrawlers don’t thrive in bins. Buy red wigglers from a reputable supplier rather than digging up worms from the garden.
What can you feed composting worms?
Worms eat fruit and vegetable scraps, coffee grounds and filters, tea bags, crushed eggshells and shredded paper or cardboard. Feed small amounts at first. Avoid meat, dairy, oils, pet waste and large amounts of citrus, onion, garlic or salty and spicy foods, which can cause smells and harm the worms.
How do I stop my worm bin from smelling?
Smells come from overfeeding, too much moisture or too little air. Feed smaller amounts, bury food under bedding, add dry shredded paper or cardboard, stir gently and make sure the bin has ventilation and drainage. A healthy bin smells earthy. Remove any rotting food that hasn’t been eaten.
How long does it take to make worm castings?
A well-run bin usually produces harvestable castings in about two to four months, depending on the number of worms, temperature and feeding. Warm conditions between about 55 and 77°F speed things up. You can harvest by moving finished material to one side and adding fresh bedding and food on the other, so worms migrate.